Wednesday, 25 June 2014

Starting Work for this summer!

After another crazy year at uni im finally home and ready to start from where I left off on the bikes!

Whils in Loughborough I collected tools online bit by bit and I now have pleanty of metal shaping tools which will be used to make a seat unit for the FZR1000 and  then used on the tank of of honda benly for my next Cafe Racer, more of that later.

So work began with a good clean and cup of tea. Once I had remembered where I was with the EXUP, I immediately invested in a whiteboard to keep track of what needs to be done.

The following Jobs that are still yet to be completed are as follows:

-Chop subframe to make it smaller.
-Fabricate Seat hoop and unit. Plus brackets.
-Weld exhaust end can on.
-Polish frame and a few other bits.
-Rebuild Rear Caliper and mount.
-Source new swingingarm bearings and fit new swinging arm and shock.
-Fit handle bars.
-Bleed front calipers.
-Sort out electrics (Guages lights etc)
-Get seat foam made and covered (Viking Vinyls)
-Paint and finishing off.

I started by rubbing down and polishing everything. This proved to be a hard slow and tedious job. However now its coming to a finish all the hard work has definitely paid off.

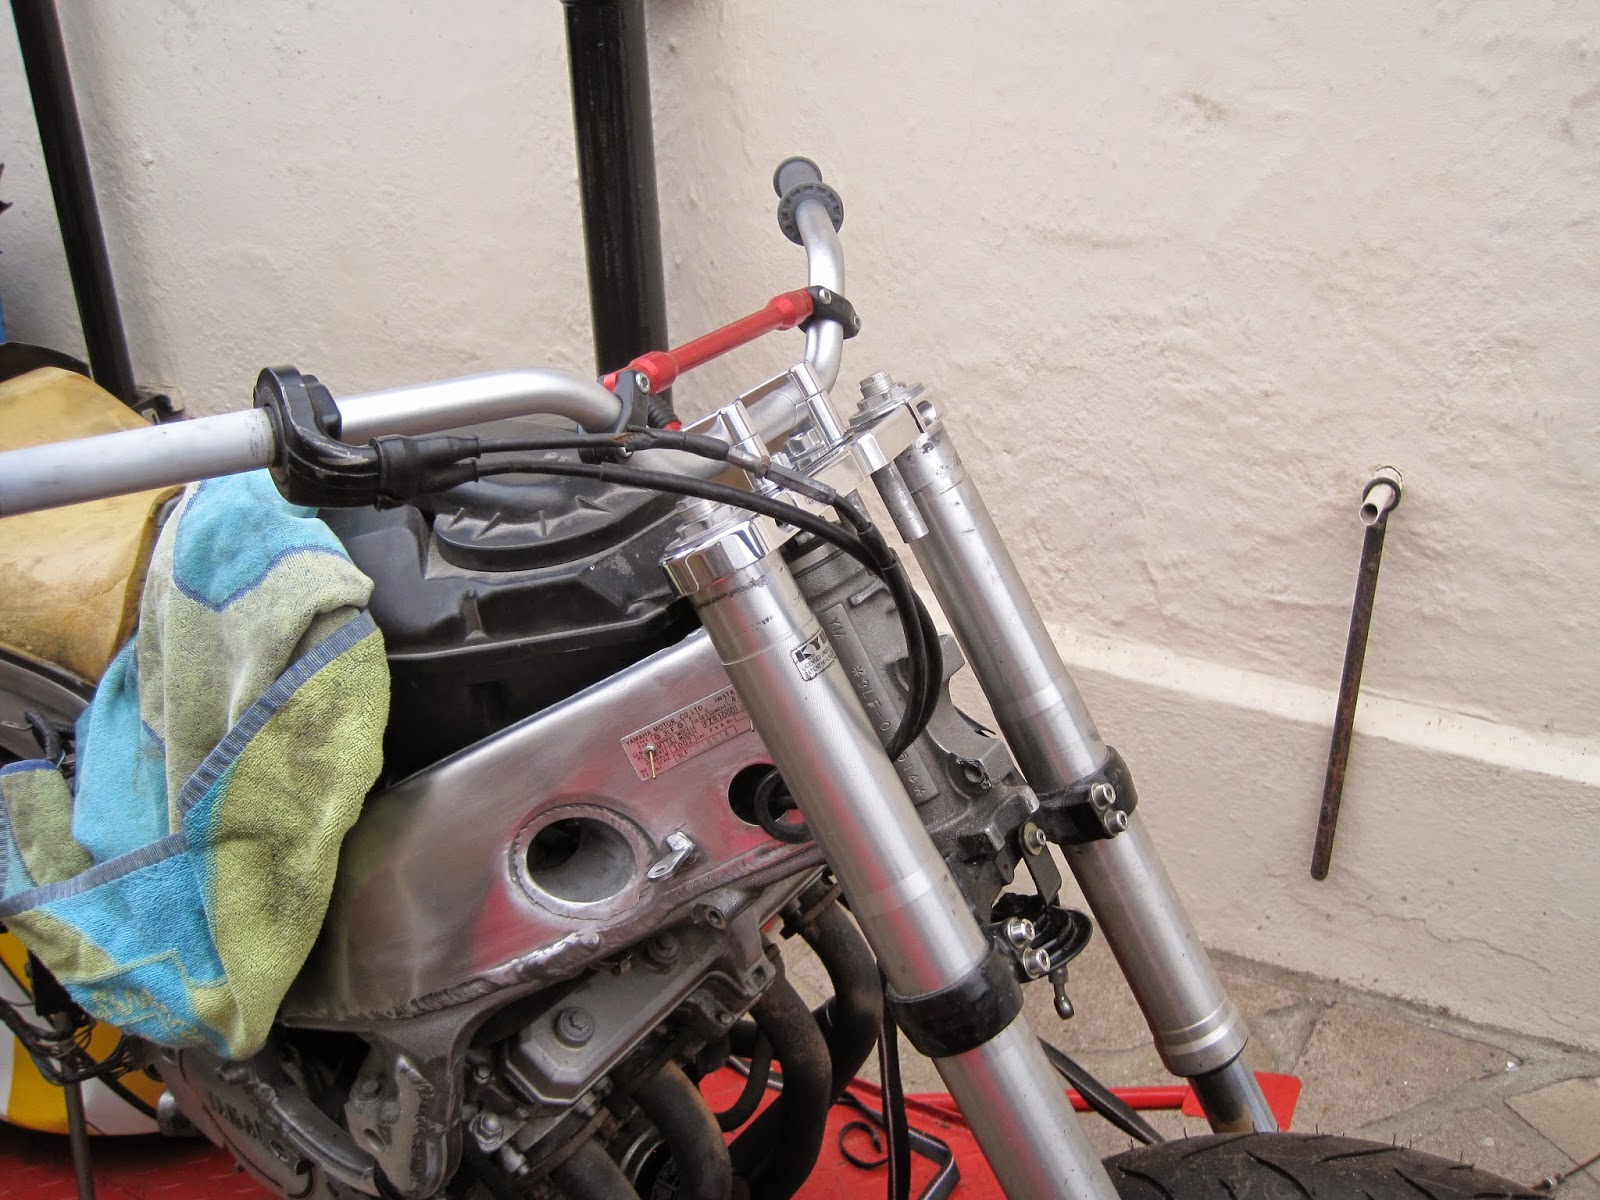
The top yoke has a painted insert and polished risers. Along with a new set of renthal bars.
 This is where the work starts with the rubbing down from 180 glass paper through to 1200.


 The rear whell spindle sliders where polished to contrast with the black powder coating of the swinging arm. This is the shine you get after the first polish with black emery, this is followed up with brown, white, green and then blue soaps to get a mirror finish. Using progressively softer wheels of course.
 The finished rear sliders, with new stainless adjusting bols and locking nuts.
 The top yoke bolted togther just to make the bike easier to move. It will all have to comeapart aging when the grips and controls are added to the bars.
 The air scoopes in the frame along with the engine mounts will be painted black to show off the polished frame.

I have smoothed down some of the welds on the frame this is now advisable as it can cause the welds to weaken, however I have removed a minimal amount of material by hand, using a power tool can heat the metal and effectivly heat treat it, this will effetc the materials properties. Because all of the rubbing was done the heat addition was minimal.
 The frame has been completely rubbed down to 1200 grit paper. Although the frame cam polished I have desided to polish the lower parts of the frame which are cast aluminium. This has to be smoothed over with an angle grinder before I could rub it down. Hopefully it will be worth it.

There was a plate riveted on, that has been removed and will be put back on once the polishing is done.
I will commense the welding this weekend hopefully. I have marked up the Subframe but I will hold off chopping it until I have a welder ready to put it all back in a different shape.

As for the Pipe the sections have been made out of stainless pipe and are waitng to be welded up!

All the welding will be TIG and done by a friend of mine who does it for a living.

Thursday, 17 October 2013

Pics are in!!!

Non-Proof pics have arrived!
Plus this one below shows the paint in the sun, plus notice there are no badges, they were my dads idea I prefer no badges it leaves people guessing what it is.


Wednesday, 4 September 2013

Shocking News!

The Bros rear shock has finally arrived from Hagon they have a build time of 4 weeks and it costs around £400. Other than looking really cool in red it has completely transformed the bike's handling characteristics for the good. With stronger brakes, stiffer forks and now a new rear shock the bike really does handle alot better than it ever has. This along with the new front tyre make it a treat to ride.

SHINY!


My Dad has decided to go touring on the bike to the South of France, I have fitted a 12V charger onto his bike this can take a satnav or phone charger it was a very simple part that simply bolted on a took a bit of chopping and routing to make it look as standard as possible.


New Footpegs

On my last couple of bikes I customised the original footpegs. This firstly adds detail and hopefully good aesthetics to the bike but it also sheds weight which is a huge bonus.

On these footpegs I wanted them to follow the contours that the seat unit will have, I wanted them to be sharp and shiny like the frame.

I started by covering them in masking tape and marking out design ideas over the top in biro this took many attempts to find a design I liked. Finally I decided on a random pattern using random sized holes. I found either clear lines all of the same size holes or random lines with random holes sizes works well. Straight lines with random hole sizes dont look right. Maybe thats just me.

I marked out most of the holes I wanted and centre punched every one of them, once the drilling was completed I cut off two sides of the foot peg so they ended at a point then I ground down the other side so at either end there was a point.

After deburring the holes I started rubbing down the surface from 120 to 1200 wet and dry. Then polished up the side. Due to a simple and small surface area this only took an afternoon to polish both.

Below you can see how I tried to make to foot peg follow the lines of the chassis.

Rubbing Down Begins

A huge job on this bike is the frame which has been previously polished but not very well it has to be said. The previous attempt left the bike with a few gauges alot of random original paint and all together a bit of a rush job.

I plan to start this job again but will take alot more care im my preparation. I will start by angle grinding the air vent welds and the cast parts of the frame. I will progress onto 120 grit paper and begin to rub the rough spots of the frame by hand.

 I will remove as much of the original paint as I can and I also plan to rub down and paint parts of the frame that aren't being polished to make the whole frame look fresh and new.
The engine mounts that comedown off of the frame will be rubbed down and painted satin black.

These air vents have no function on this bike, I have decided to smooth the welds around them and spray them satin black I think this will contrast well with the polished frame.


Clearance issues!

Once the clock mount was on the yokes could finally hold the new bars for the bike. However with a bigger master cylinder off of a Hayabusa there was an issue with clearance.
With the bars central and the throttle grip flush with the end of the bar the master cylinder banjo bolt was fouling the top yoke.
I decided to cure this with extra spacers or risers, I went to a friends workshop in Swanley (Steven Fellows Engineering) There I used his lathe to produce four ally spacers all around 20mm high which is more than enough. These were made to be within a +- 0.1mm tolerance.
Another job that required the lathe was the top nut. The original was in poor shape so a replacement was bought however it didnt have enough clearance to tighten down it would bottom out because it is a domed nut. This was put into a lathe and skimmed along the top until the hole was big enough for the screw to come all the way through the nut. I prefer the aesthetics of this to a domed nut, it looks alot more industrial and custom.
I will explain all the dust in the next post!!!

Clock Mounts

My next job on the bike was to make mounts for the clocks, The originals bolts onto the headstock, this means the clocks needed to clear the forks and stuck out at the front of the bike. This looks silly on a naked bike so I decided to make a new mount that used two M8 tapped holes on the top yoke as a mounting point.


This means the clocks will now turn along with the bars and it will all be alot neater at the front end. I used two ally spacers and some 20x3 steel flat bar to make the mount, I started by welding two plates onto the original clock mounts so the bolts holes were still in the correct place once all the MIG welding was complete I set about chopping all the bits off that were no longer needed.

Once they were mounted they needed more trimming to stop them fouling the ignition barrel but other than that they fitted a treat and the 30 degree angle for the clocks is perfect when sat on the bike.