Monday, 30 June 2014

PRM Motors Petrol Cap and Stencils


For the HOnda CD200 Cafe Racer I thought I would let myself loose with a ruler and my letter stamps, I decided it would be a nice touch to have PRM MOTORS stamped into the petrol cap. I meansured it all out to make it horizontal and evenly spaced. However after one swift hit from the hammer the cap bent inwards and the stamp left no real marks, I can't take the cap out and put something solid under neath it to supply some resultant force because there is a locking mechanism under it that would get damaged and render it useless.

From this disaster I decided to make some PRM MOTORS stencils. I enjoy stancil making it takes time and alot of measuring plus any form of graphical communication in an engineering sense is enjoyable for me.
 Overall dimensions (50x130)
The top one didnt work because I accidentally sliced of part of the R.
The one below it came out just how I wanted.


I though I would make a smaller stencil that had the full PRM MOTOR in.
This took alot of planning to give it the exact proportions as the drawing above.
Im pleased with how this one turned out especially as there was alot of free hand cutting involed.
Overall dimension (40 x106)

I dont know where im going to spray these onto first!

Welding will commence tonight I will have a fresh post and pics by Wednesday 2nd.

Panel Beating Knee Indents

At the moment the main work going on is the welding that can only be done when my friend andy has the time so that puts me at a loose end when hes away.

I thought a useful investment of my time would be to get out the panel beating tools I recently aquired and bash some knee indents into a petrol tank.

The project after the big Yamaha exup is a little Honda CD200 Benly that is due to be chopped up and made into a neat cafe racer. This will also be my first bike so I need to find some power in that little engine.

To make the knee indents it is extremely simple. Firstly sit on the bike and with a permanent marker (sharpie) make a rough guide of where you want the indents.

 I placed an A4 sheet of card over this and gradually trimmed it down until I had a decent fit.
 I developed my indent template around my knees to fit snug into the tank when my bum is further back on the seat.

 Using the card tamplate mark out an outline on both sides of the tank with the same template. I have alot of CD200 parts lying around so I used a spare tank to save time.

Starting from the centre and working my way out I simply hammered away until I was satisfied with the shape and symetry of the indents.
 I found it easier to neglect the out line and follow the contours of the tank only in the bottom left corner of the knee indent.
 These are my tools of choice I managed to pick them up for an abosolute steal on ebay. They are all made from Lignum Vitae which is a really dense and tough wood.
The indents could be filled and smoothed with filler but I think I will leave the raw hammer marks. I will coat the bare parts of the tank in lacquer to prevent any corrosion now that some of the paint has flaked off.

Saturday, 28 June 2014

Welding Begins

So the two main TIG welding jobs that need to be undertaken on the bike are the Exhaust Pipe. Then the Chopping of the original subframe.

This post is about the Exhaust pipe.

The Standard pipe has been chopped down and three new section of stainless pipe will be welded on. The TYGA Maggot end can will then slip on the the pipe. The Overall length will be alot shorter, in terms of performance this should shift the torque to the higher RPM values. It will also make the exhaust note a higher pitch. Plus it looks really mean and aggressive!

 My mate Andy came round with his TIG plant to do all of the welding. Hes qualified to do stainless pipe welding, I would love to learn but maybe later.
 The three sections were ground down and smoothed out .
The pipe slotted straight on its a very snug fit.

The last job will be to make up a piece of flat plate with a hole in it to weld onto the exhaust so that the springs can hook the end can on.

Rear Brake Caliper Service


The rear caliper was working when we received the bike however it looked worse for wear and a rebuild kit is too cheap to say no to a rebuild.

The Caliper itsself uses two pistons with a bleed nipple for eash side. This is a great design and works well however when it comes to servicing its a bit of a nightmare. The Bleed nipples are very delicate and both of them snapped on our caliper.

The pistons are also very large so a piston pulling kit for normal bikes cant be used and an alternative car tool needs to be used to remove the pistons.

Its is always good prectice to pump the pistons out with the mastercylinder still connected. Of course I forgot this and unbolted all of the hydraulic cables a year ago blissfully unaware.

So after snapping the two nipples I quickly bought another caliper that had two free moving nipples offline. I then connected the mastercylinder and reblead the system on the bench. Using this set up I pumped the pistons out as far as they would go. For the bleeding I used a syringe that I bought off of ebay for £3 to suck the fluid through the system. This worked very well in conjunction with the conventional master cylinder pumping it through.

A jubilee clip was clamped around the pistons and they were levered out after the caliper had been split open. There was a bit of surface corrosion and the rubber seal very completely gone.
 The corrosion behind the dust seal mainly, causes the pinching on the piston and makes for a stiff and poor performing brake.
 I use this bent piece of steel and a scribe to break up the corrosion along with WD40 GT80 or just brake cleaner to help blow it away and clean it up,
 Corrosion  behind the dust seal is very prominant. Not so much in the hydraulic seal.
This can be overcome by introducing another dust seal that clips onto the front edge of the piston and is more like a gator beacuse it extends with the pistons positve displacement. This is very common in cars to improve the working life of the brakes.

 Before.
 After.

A dremmel can be used its effectively a dentist drill meets actual drill. The attachments can be very thin and fit into these groves perfectly. However They are delicate and damage can easily be done to both the tool or the caliper.
 I use rubber grease when fitting any new rubber seal, it helps hold off corrosion and helps the movement of the piston.

 New dust seal get the rubber grease treatment too.
 The piston was sprayed and cleaned with a rag to get any old deposits off, then its slides straight in. note, if the piston doesnt slide in with just one finger then pull it out and clean out the seal groves again it means the seals are still pinching.

This is how I get by without a bench wire wheel for now.

Simple piece of cardboard makes a great bolt holder. 

The hydraulic seal inbetween the two halves of the caliper were also replaced plus the corrosion was scraped off using a straight edge.
 The caliper bolts were cleaned and sprayed just to help its aesthetics, then the nipples were copper greased up and fitted along with their new rubber caps, which were also rubber greased up.
 Suns out guns out.
I cleaned up the caliper mount and bolts.
Its now ready to be fitted and blead.

The next job will be the welding of the exhaust and the subframe, the newly powdercoated swinging arm and new tyres wont be near the bike until all the welding/grinding is finished off.

Until next time!

Wednesday, 25 June 2014

Starting Work for this summer!

After another crazy year at uni im finally home and ready to start from where I left off on the bikes!

Whils in Loughborough I collected tools online bit by bit and I now have pleanty of metal shaping tools which will be used to make a seat unit for the FZR1000 and  then used on the tank of of honda benly for my next Cafe Racer, more of that later.

So work began with a good clean and cup of tea. Once I had remembered where I was with the EXUP, I immediately invested in a whiteboard to keep track of what needs to be done.

The following Jobs that are still yet to be completed are as follows:

-Chop subframe to make it smaller.
-Fabricate Seat hoop and unit. Plus brackets.
-Weld exhaust end can on.
-Polish frame and a few other bits.
-Rebuild Rear Caliper and mount.
-Source new swingingarm bearings and fit new swinging arm and shock.
-Fit handle bars.
-Bleed front calipers.
-Sort out electrics (Guages lights etc)
-Get seat foam made and covered (Viking Vinyls)
-Paint and finishing off.

I started by rubbing down and polishing everything. This proved to be a hard slow and tedious job. However now its coming to a finish all the hard work has definitely paid off.

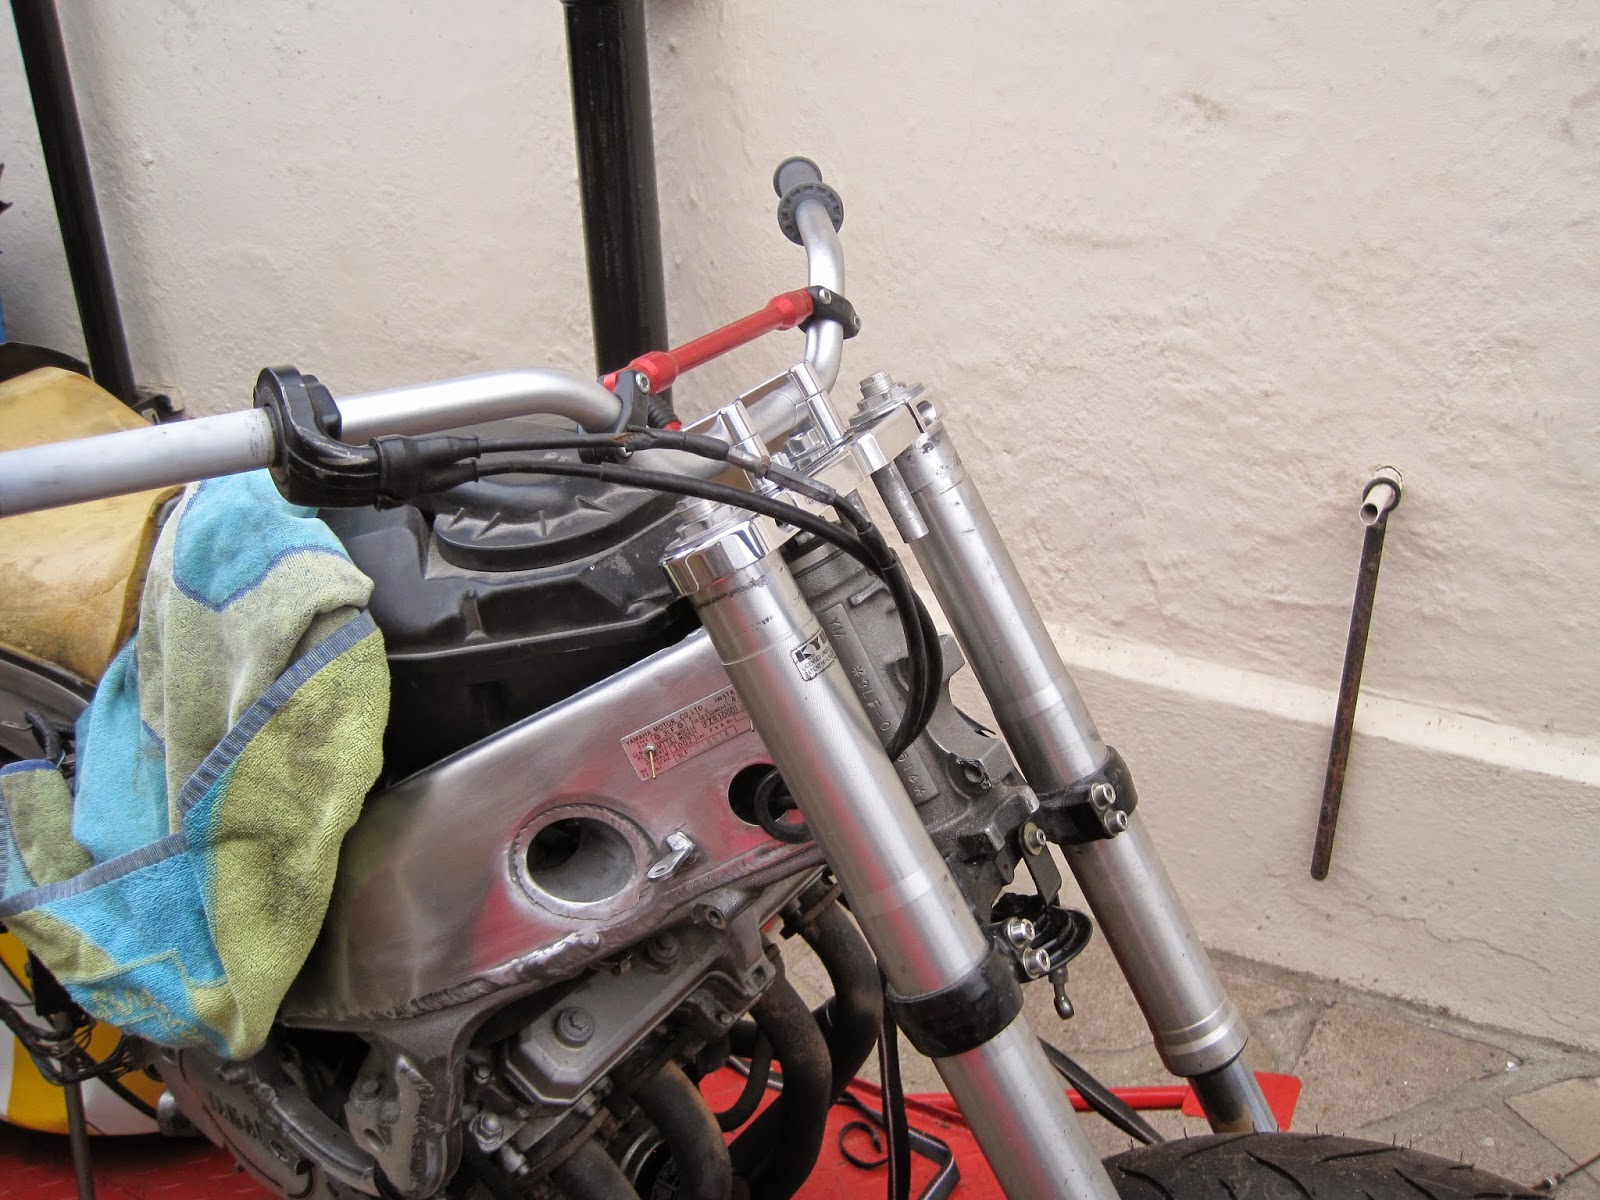
The top yoke has a painted insert and polished risers. Along with a new set of renthal bars.
 This is where the work starts with the rubbing down from 180 glass paper through to 1200.


 The rear whell spindle sliders where polished to contrast with the black powder coating of the swinging arm. This is the shine you get after the first polish with black emery, this is followed up with brown, white, green and then blue soaps to get a mirror finish. Using progressively softer wheels of course.
 The finished rear sliders, with new stainless adjusting bols and locking nuts.
 The top yoke bolted togther just to make the bike easier to move. It will all have to comeapart aging when the grips and controls are added to the bars.
 The air scoopes in the frame along with the engine mounts will be painted black to show off the polished frame.

I have smoothed down some of the welds on the frame this is now advisable as it can cause the welds to weaken, however I have removed a minimal amount of material by hand, using a power tool can heat the metal and effectivly heat treat it, this will effetc the materials properties. Because all of the rubbing was done the heat addition was minimal.
 The frame has been completely rubbed down to 1200 grit paper. Although the frame cam polished I have desided to polish the lower parts of the frame which are cast aluminium. This has to be smoothed over with an angle grinder before I could rub it down. Hopefully it will be worth it.

There was a plate riveted on, that has been removed and will be put back on once the polishing is done.
I will commense the welding this weekend hopefully. I have marked up the Subframe but I will hold off chopping it until I have a welder ready to put it all back in a different shape.

As for the Pipe the sections have been made out of stainless pipe and are waitng to be welded up!

All the welding will be TIG and done by a friend of mine who does it for a living.